The Ultimate Step by Step Guide to Building a Modern Decked Area in Your Garden

Designing a garden is not as easy as it once was. The options available to everyone now are immense when considering materials to use. Paths, for example, used to be either slabs, gravel or concrete. Now we can use blocks, natural stone, marble, stone chippings, and even glass beads. While settling on the best design for you is difficult, it has never been so much fun since all of these materials became available for the masses.
Patios are no longer a flat, plain, surface. Since they are used mostly for entertaining, they have become elaborate affairs. With water features and built in lighting effects, they can be works of art.
In this article, we are going to take a look at timber decking. It is an extremely versatile solution for an entertainment area that can be constructed where other surfaces can’t. Take, for instance, a steep slope. It would be a major construction project to build the ground up for a hard standing patio. Decking, however, can be raised very easily. Here’s how to go about constructing your own decked area.
Tools Required
Only basic tools are needed, though it will be hard work if the construction is done entirely by hand. Here is an ideal tool kit:
-
Spade
-
Hammer
-
Cordless Drill
-
Electric Drill
-
Nail Gun
-
Circular Chop Saw
-
Multi-purpose Hand Saw
-
Wood Chisels
-
Spirit level
- Cement Mixer
The Building Process
1. Mark the outline of the decking using string and pegs. Decking can be any shape but try to avoid small curves if possible.
2. Decide where the vertical supports (posts) are going to be placed.
3. Excavate holes for the support posts and place a layer of hardcore in the bottom to give a little drainage. Concrete the post in place. There is no need to worry about getting them to the right height at this stage.
4. Once the posts are in place, begin joining them together with floor beams.
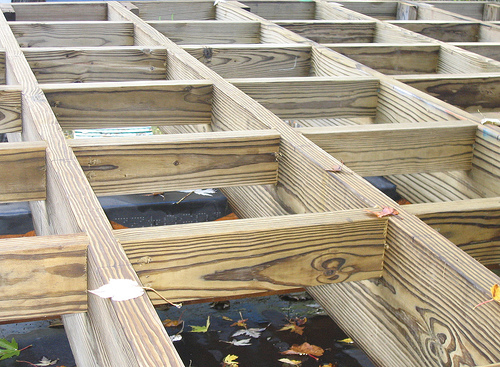
5. Fit the cross pieces to create the grid framework for the floor.
6. The vertical support posts can now be cut off flush with the floor beams.
7. Begin laying planks for the floor. The chop saw and nail gun will make this job much easier. Take your time, space the boards evenly, and do a good job. This is, after all, the finished surface that will be on display to visitors.
8. When the floor is complete, begin work on the handrails and trimmings. It is these final touches that make your decking stand out.
9. Install a lighting system. This can be either recessed fittings in the floor, or maybe overhead lights in a pergola. It is wise to employ a qualified electrician for this task, but low voltage lighting kits are available that can be plugged into the house or shed. These kits are safe to install yourself.
Now you are the owner of a stunning decked area in your garden. Maybe you will choose to enhance it further by building a roof structure with clear PVC sheeting and hand drapes to the structure as in the first image. Your entertainment area could then be used during showery weather too. Stunning features can be created with wood in your garden and the high pressure method of preserving the timber will make it last for decades. Building decking is fast and economical. What more could you want?
